How to Setup Parental Controls on Chromebook

Last updated:5월 29, 2023
Chromebooks are great for everyone and especially greater a solution for kids. While is it important to have the kids exposed to such kind of tools, it become deeply necessary to keep a continuous watch on them. Chromebook being a great tool opens up the window to have an access to content from around the world. So, it becomes imperative that you as a parent know where your kids are engaged in. If you are a parent, you know how critical an activity it is for you to guide your kids. Don’t you want to keep your kids away from any distraction? It is you, who has to make sure that the family remains safe and well connected. Taking this thought forward, how about managing parental controls in Chromebook? So, there is way to keep a track on how kids are using Chromebook and along with managing and limiting the kid’s internet access whenever required. This can be done by creating Supervised User which activates Chromebook parental controls. If you are concerned about your kid spending too much time on internet, it’s time you took action and stopped worrying because this article brings you the best ways to supervise your kids while they use internet.

Part 1: Setup Supervised User Account on Chromebook
While the World Wide Web could be a wild place for the kids, setting up a Supervised Account could be like fencing the playground for the kids so that they are there where you want them to be. Yes, internet is something that is connected to almost everything we do, but at the same for kids, internet could have a negative impact unless supervised by parents. That’s where the parental controls come in and that’s what exactly is provided as a feature in Chromebook. You can limit internet usage, block sites, set time limits for usage, etc. Here are steps to setup Supervised User Account on Chromebook.
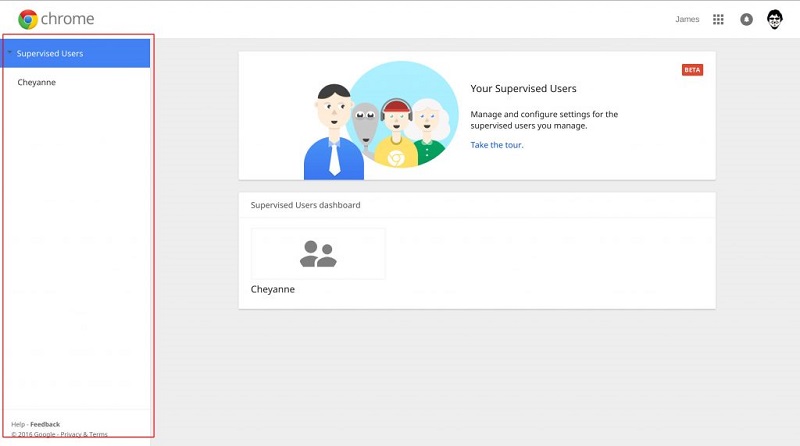
Step 1: Logging in to Chromebook with Google Account
For supervised user accounts to work, they have to be connected to the Google account. Set up you profile on the device.
Step 2: Enabling Supervised User Flag
Supervised User Flag remains off by default. To enable that follows the steps below:
• In a new tab, visit chrome://flags
• Come down to find “Enable Supervised Users” option
• Click on “Enable” and then restart the session.
Step 3: Creating New User
It’s time now to create new user once the Supervised User Flag is enabled. You can initiate with creation of a new local managed user account. To create:
• Sign out of your Google account on the device and restart the device.
• Select “Add User” which is present at the bottom left menu on the login screen
• You will now be presented with a login screen. So, select “Create a supervised user”.
• Fill up all the user credentials. Select a password and a profile photo in the process.
Step 4: Verify and manage the account on web
Once the above steps are completed, the Supervised User Account can be logged in. Now, it’s time to manage the account online. Management tool is free to use and available at chrome.com/manage. If prompted to log in to your Google account, use your own account credentials to login.
Part 2: Manage Supervised User Account Restriction
Once the Supervised User Account is created, you can easily manage the account online. Here, you can block websites that you wish to be blocked, limit internet usage restrictions, set time limits, etc, and track and keep a watch on the activities of the kids.
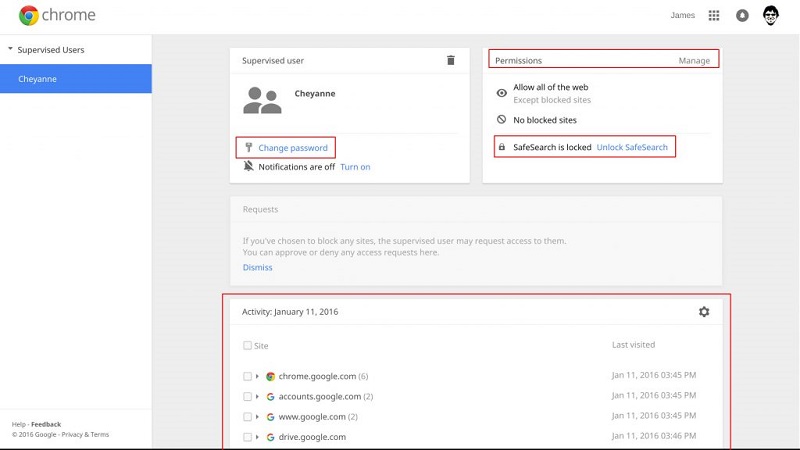
Step 1:
Go to www.chrome.com/manage. If you want, click on the take a tour button to guided and navigated through the dashboard. You can skip this tour and move directly and click the Manage link.
Step 2:
The Allow drop down box defaults to All of the web. It is easier and suitable to change that to only specified sites and then enter the list of sites you are okay with your child visiting them. So, change that to “Only specified sites” as shown in the picture above. To specify individual websites in the list of websites you are happy with your child visiting, you need to type the website. For example, if you would want your child to have an access to Facebook, type facebook, and same goes for other websites like youtube, bbc, etc. Press enter after adding each name and then move on typing the next website name.
Step 3:
To be more precise and specific in calling out the websites you would like your child to have an access to, use the drop down options beside the text box where you type the website name, as shown in the picture below.
In this case, suppose you want the child to have an access to “milkshake.channel5.com”, a sub-domain of “www.channel5.com” and not the Channel 5 itself, you can specify it here. When you are done, click OK.
Step 4:
Now, when you wish to switch users to enable restrictions including Google SafeSearch to filter search results, click on the new head icon present at the top left of the Chrome browser window.
Step 5:
You can add bookmarks to all the websites you have allowed for the Supervised User to make it easier for the user.
Step 6:
If you have allowed YouTube, turn on safety mode using the safety drop-down menu at the bottom on the YouTube page.
If the Supervised User tries to visit a website that is blocked by you, they will get a message saying they need permission to have an access to the website. They will be presented 2 options, one of them being “Request Permission” and if the Supervised User clicks it, you will see this in your dashboard and you can decide whether to allow access.
You can allow or deny access in the below dashboard.
Step 7:
The user’s activity can be viewed pertaining to site requests. You can see which pages the Supervised User has viewed by expanding each domain.
Part 3: Chromebook Parental Controlling Time Limites
Time limits can be set in Chromebook to limit the time of usage of internet through Chrome. You can have better parental controls using Google Chrome extension. Nanny for Google Chrome extension can be used as a parental control tool to block URLs and set time limits on websites.
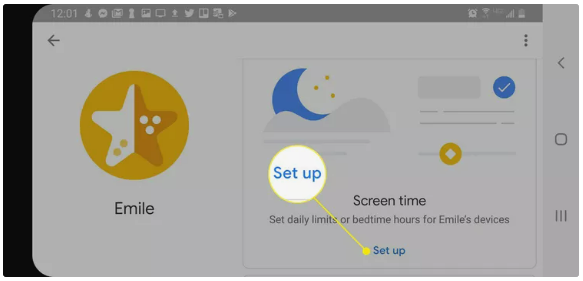
You can easily set the blocking time and specify the websites that are to be blocked for the Supervised User. You can set the days along with blocking the websites which you do not wish to be accessed by the Supervised User. Having such features to restrict internet usage in terms of time and data along with blocking specified web sites, Nanny for Google Chrome extension is one of the best ways to reinforce parental controls in Chrome.
So, these are few ways as means of parental controls in which you can have a watch on what your kids are doing on internet and how much time have they been on a particular page. Along with tracking and monitoring, these tools are also responsible for controlling the kids when using internet.
Part 4. SpyX-The Best iPhone Monitoring App for Parents
If you worry about your children’s safety when they use the phone, such as addicted to games app, browsing inappropriate content or websites, chatting with predators/scammers on social media apps (WhatsApp, Instagram, Snapchat,ect), you can choose SpyX phone tracker.
SpyX is a great choice for parental control. It can monitor all activities on your children’s phone, such as text messages, phone calls, GPS locations, photos/videos, email, browsing history, browser bookmarks. What’s more, you can also set specific controls, for example, you can block some apps, websites to protect your children from adult content.
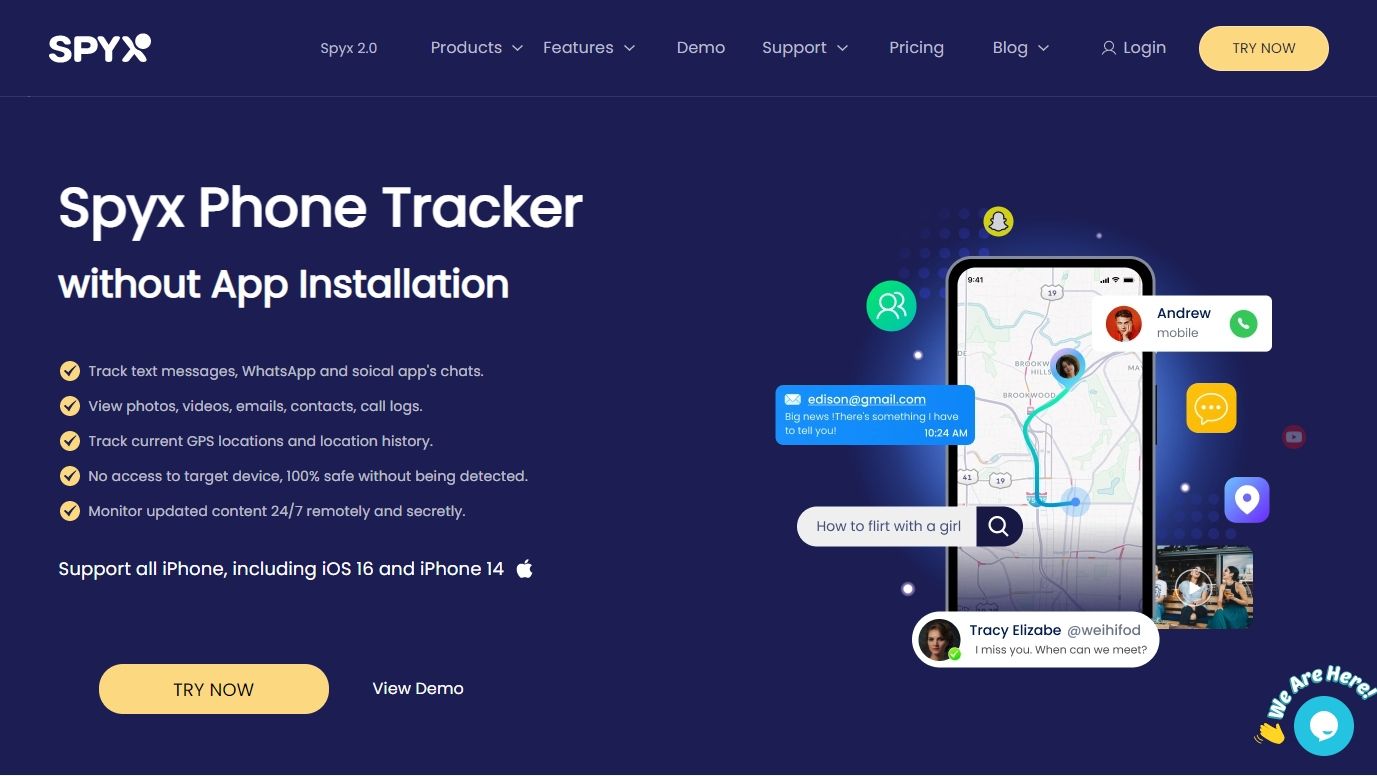
Key Features of SpyX
SpyX comes with strong tracking features. Let’s learn more tracking details together.
View Text Messages
SpyX enables you to view all text messages, including all sent and received messages, even deleted ones. iMessages and social media messages are also available. You can know who your children contact with and what they are talking about.
Track GPS Location
SpyX enables you to track live location as well as location history. Thus you can be clear whereabouts of your children.
Keylogger
Keylogger is very useful for parents. It can capture all key strokes that children input or search on the phone.
Block Apps/Websites
Be afraid that your children addicted to games app, or porn content? You can use blocking features to restrict some apps and websites on your children’s phone.
Works Remotely
Once you finish setup, you don’t need the target phone anymore. You can monitor your children’s phone far away without them knowing.
High Safety
With SpyX, you never worry about data leak. SpyX is 100% safe and reliable. Only you have right to view the data stored on your children’s phone.
Compatibility
SpyX is compatible with all iOS devices. You don’t need to test the device compatibility before purchasing.
Use SpyX in Three Easy Steps
Here are detailed guideline for SpyX operation. Just follow the steps.
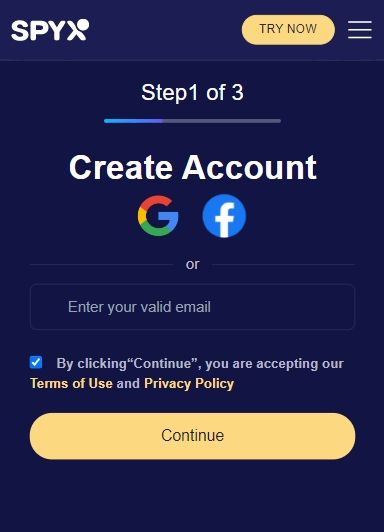
Step 1. Register
Click on “TRY NOW” to sign up free. All you need is a valid email.
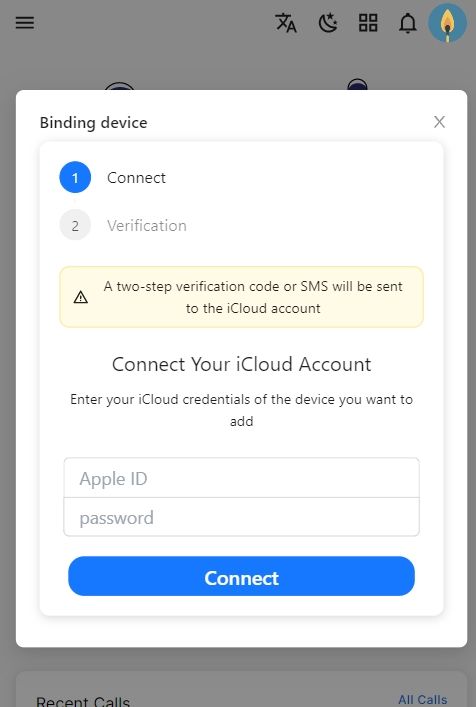
Step 2. Add iCloud Details
After you create a SpyX account, you need to purchase suitable plan. Then bind the target phone with SpyX by enter iCloud details.
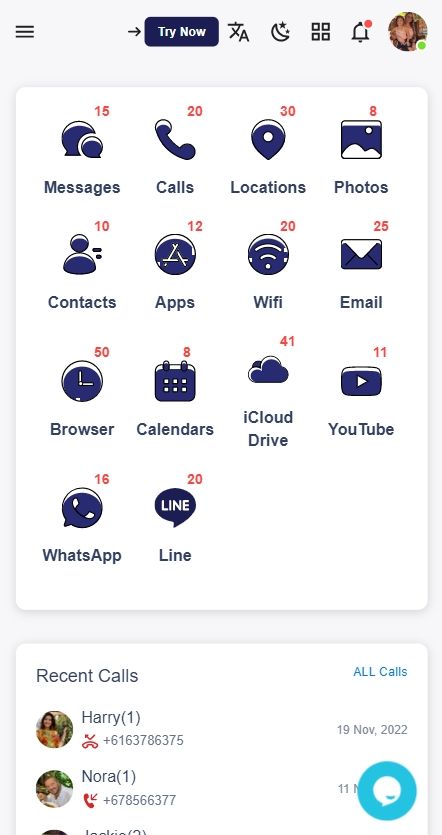
Step 3. Start Monitoring
Login to your SpyX dashboard and you can view all specific data on the target phone.
More Articles Like This