How to set custom ringtone on iPhone | 2 effective ways

Last updated:jul 24, 2024
Table of content
Setting a custom ringtone on your phone is a cool thing to do. Here are a few methods to teach you how to customize your ringtone on iPhone without purchasing from the Apple Store. You can follow this step-by-step guide:
Method 1: Using iTunes (or Finder on macOS Catalina and later)
Step 1: Create the Ringtone File
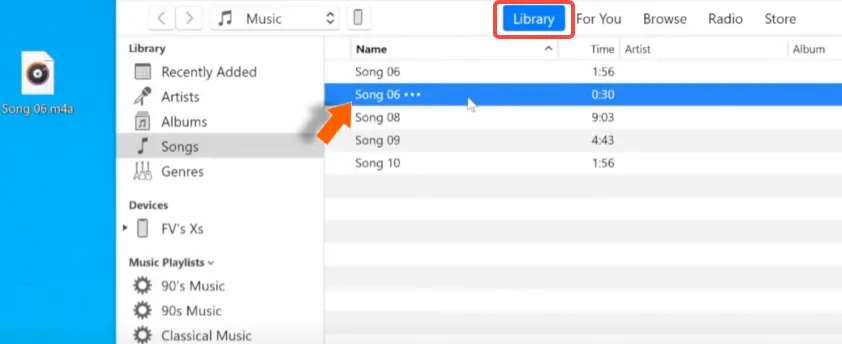
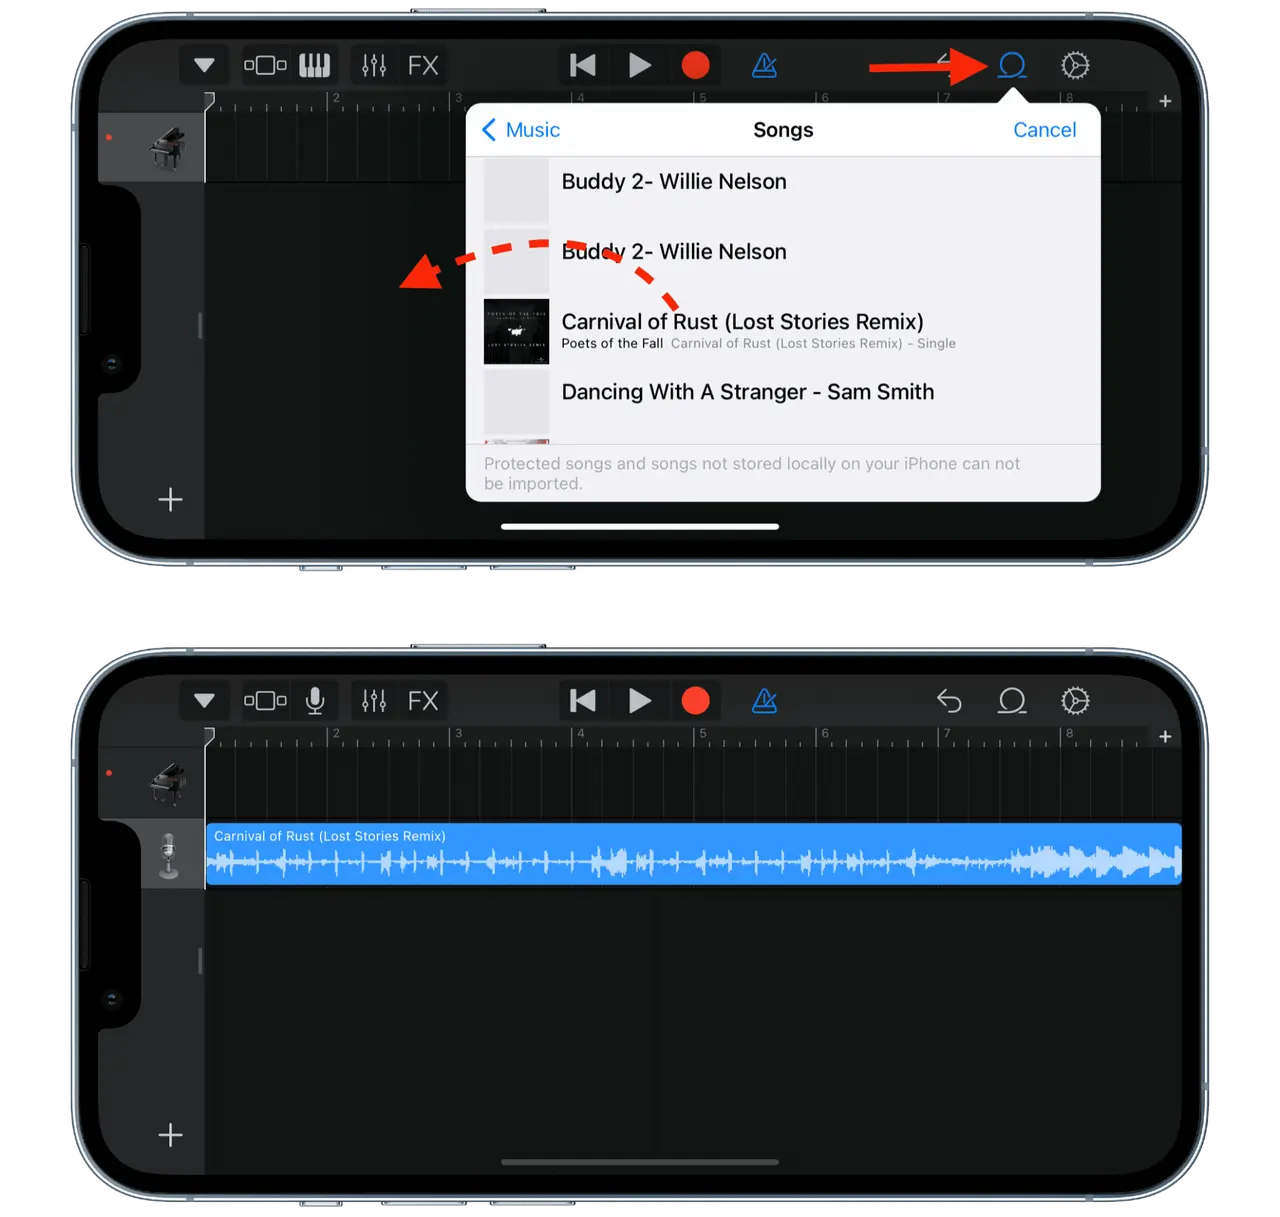
- Launch the music app and go to your music library.
- Choose the audio file you want to use for your ringtone. It could be a song or any audio clip in formats like MP3, AAC, etc.
- Trim the audio file to a maximum of 30 seconds. You can use audio editing software like Audacity, GarageBand, or online tools.
- Convert the file to M4A format if it is not already. Most audio editors can export to this format.
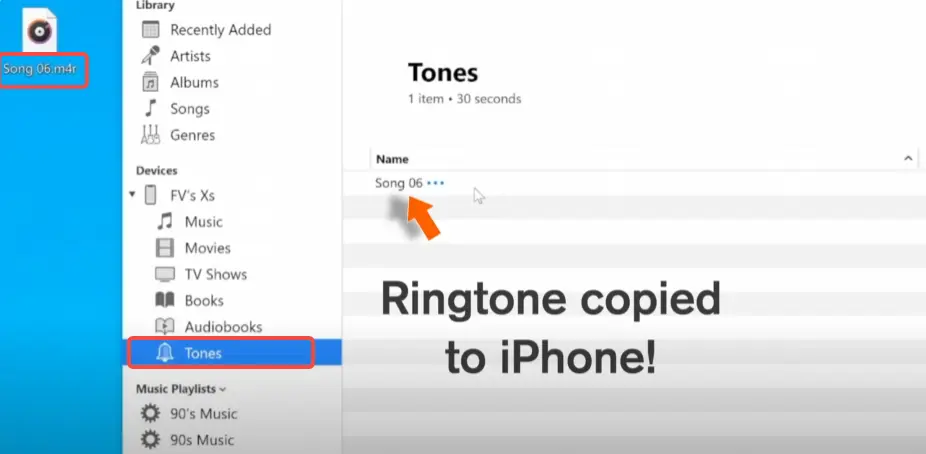
- Rename the file extension from .m4a to .m4r. This is the format iPhone uses for ringtones.
Step 2: Add the Ringtone to iTunes/Finder
- Open iTunes on Windows or macOS Mojave and earlier. If you're using macOS Catalina or later, use Finder.
- Connect your iPhone to your computer using a USB cable.
- Drag and drop the .m4r file into the “Library” section of iTunes, or directly into the “Tones” section in Finder if you're using macOS Catalina or later.
Step 3: Sync the Ringtone to Your iPhone
- In iTunes, click on the device icon that appears when your iPhone is connected.
- Go to the “Tones” section under your device.
- Drag the .m4r file from your library to the “Tones” section.
- Click on “Sync” to transfer the ringtone to your iPhone.
Step 4: Set the Custom Ringtone
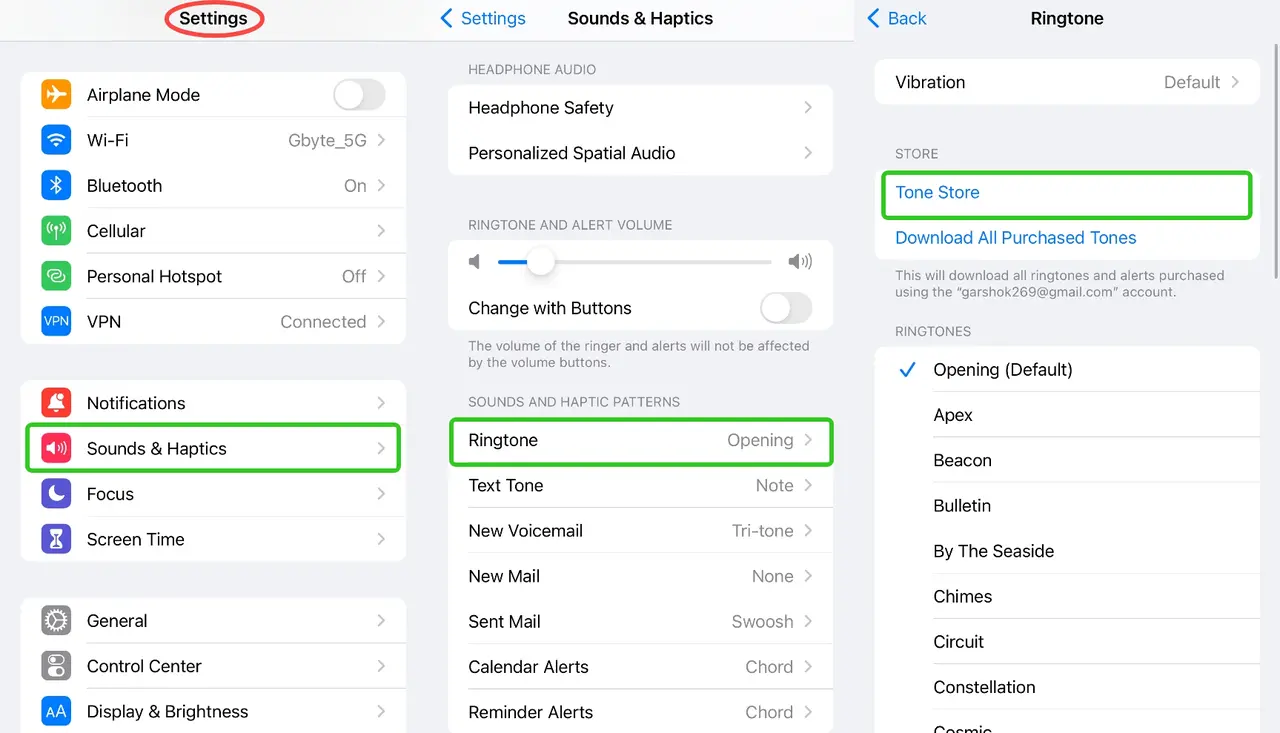
- On your iPhone, go to “Settings” > “Sounds & Haptics” (or “Sounds” on older versions).
- Tap on “Ringtone.”
- You should see your custom ringtone listed at the top. Select it as your ringtone.

Method 2: Using GarageBand on iPhone
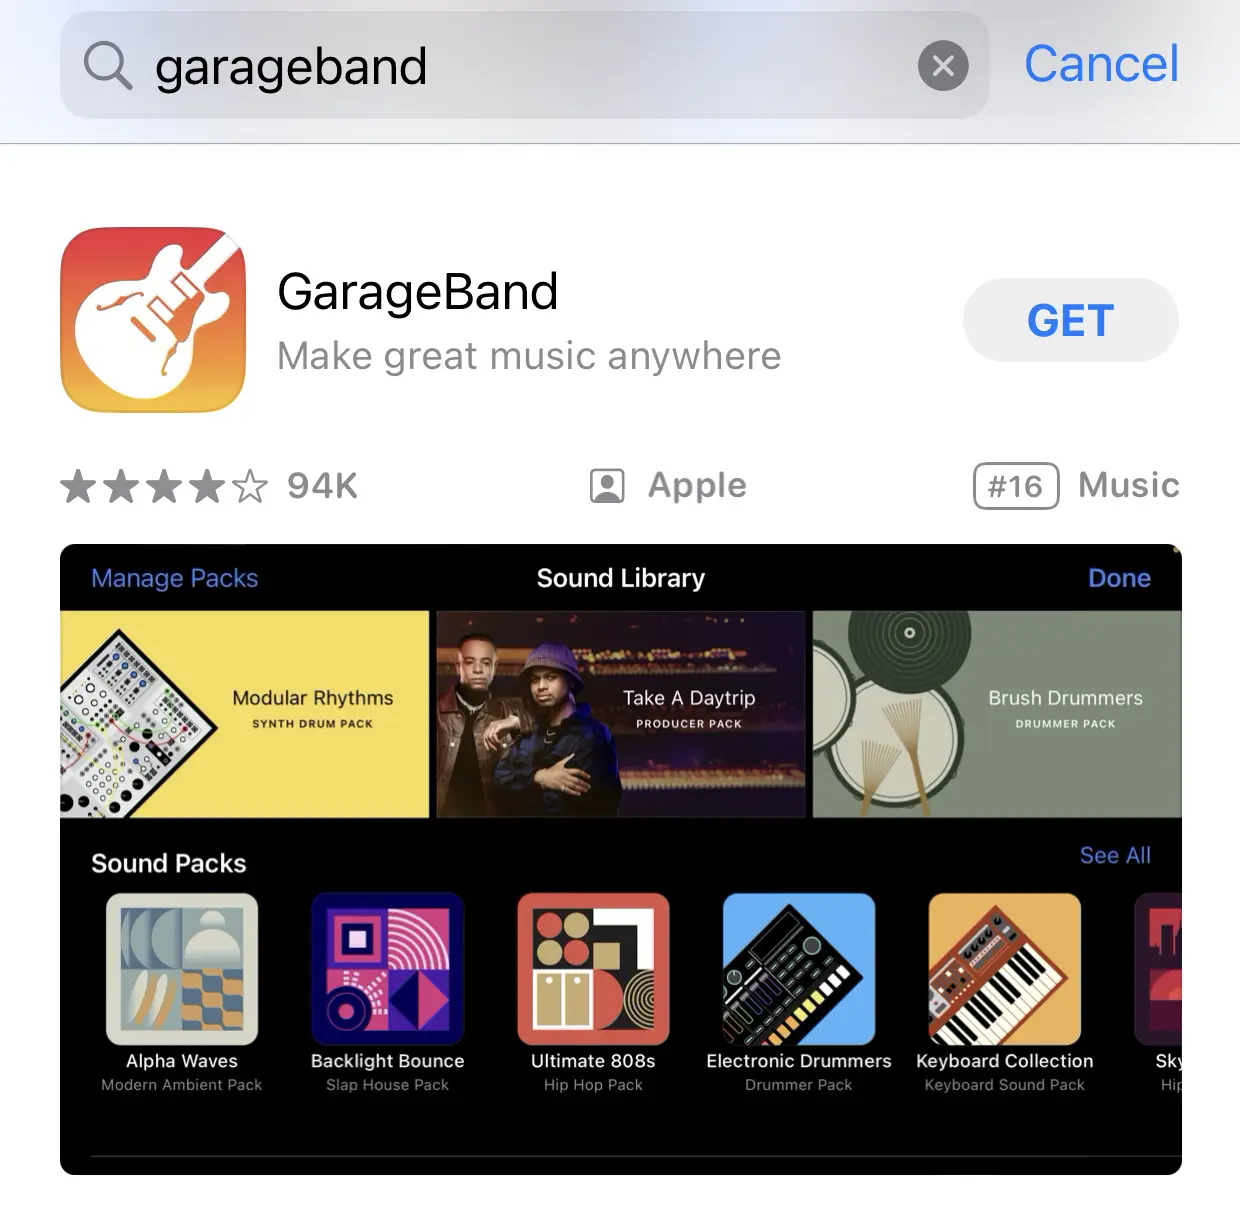
Step 1: Download and Install GarageBand
- Download and install GarageBand from the App Store if you don’t already have it.
- Note: This app requires iOS 17.4 or later.
Step 2: Create the Ringtone
- Open the app and create a new project.
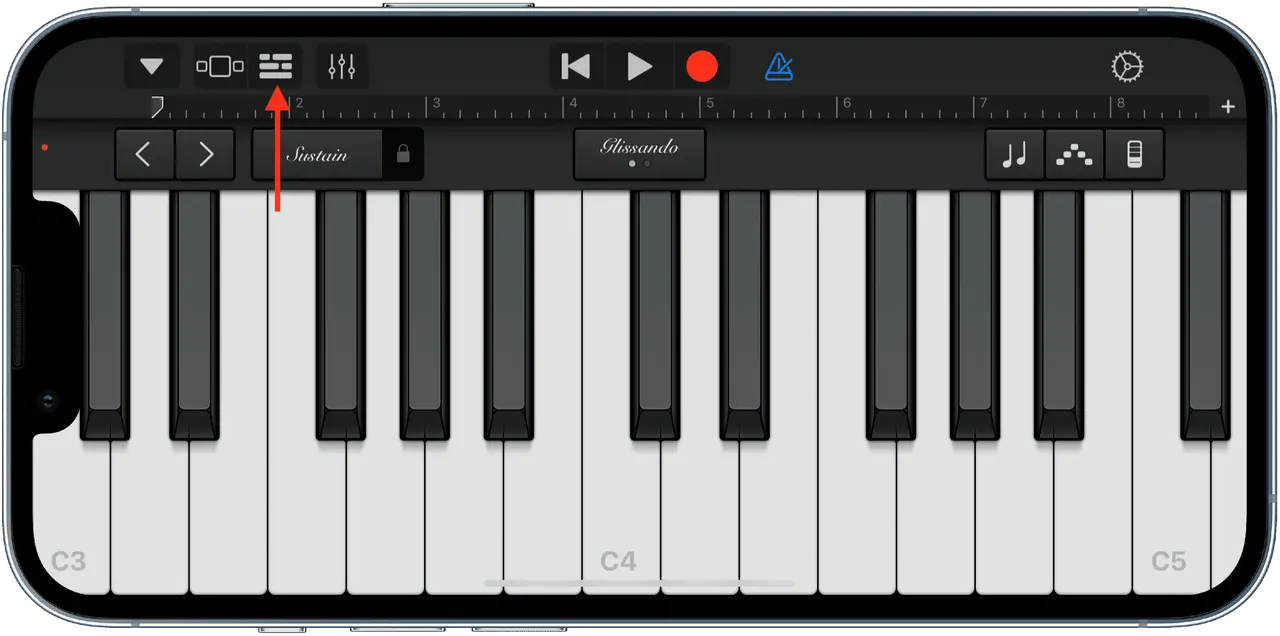
- Tap the + icon to create a new project. Choose Audio Recorder (or any instrument if you prefer).
- Tap on the Tracks view button (looks like a series of horizontal lines).
Step 3: Import the Audio
- Tap the Loop Browser button (looks like a loop icon).
- Go to the “Files” tab and locate the audio file you want to use.
- Drag the file into the project timeline.
Step 4: Edit the Audio
- Trim the audio to 30 seconds or less.
- Adjust the start and end points of the audio file to ensure it is no longer than 30 seconds. You can do this by tapping and dragging the edges of the audio clip.
Step 5: Export as Ringtone
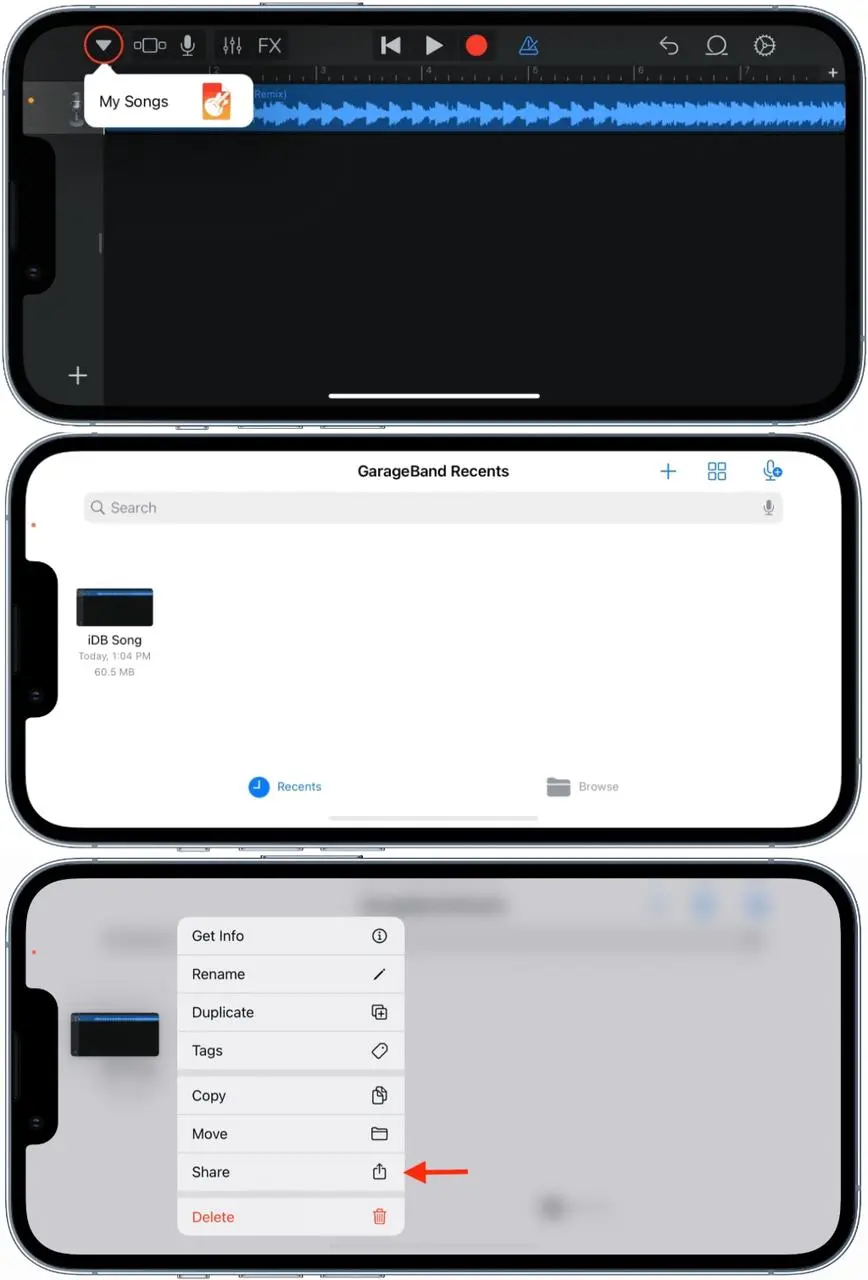
- Tap on the down arrow in the top left corner and select “My Songs.”
- Tap and hold on the project you just created and select “Share.”
- Choose “Ringtone” as the format.
- Name your ringtone and tap on “Export.”
- GarageBand will export the ringtone and prompt you to use it right away.
Step 6: Set the Custom Ringtone
- After exporting, GarageBand will ask if you want to use the ringtone as your standard ringtone, text tone, or assign it to a contact.
- Or you can go to “Settings” > “Sounds & Haptics” > “Ringtone”. You should see your newly created ringtone listed at the top. Select it to set it as your ringtone.
By following these steps, you can customize your iPhone’s ringtone to any sound or song you prefer. And you needn't purchase one from the iTunes Store.
Extra: How to buy ringtones from Apple
The above are two ways to set the iPhone ringtone for free. If you don't want to be so troublesome, you can also buy it directly in the iTunes Store. Here are the specific steps:
1. Open the iTunes Store App:
- Locate and tap the iTunes Store app on your iPhone's home screen.
2. Go to the Ringtones Section:
- At the bottom of the screen, tap on "More" (three dots icon).
- Select "Tones" to go to the ringtones section of the iTunes Store.
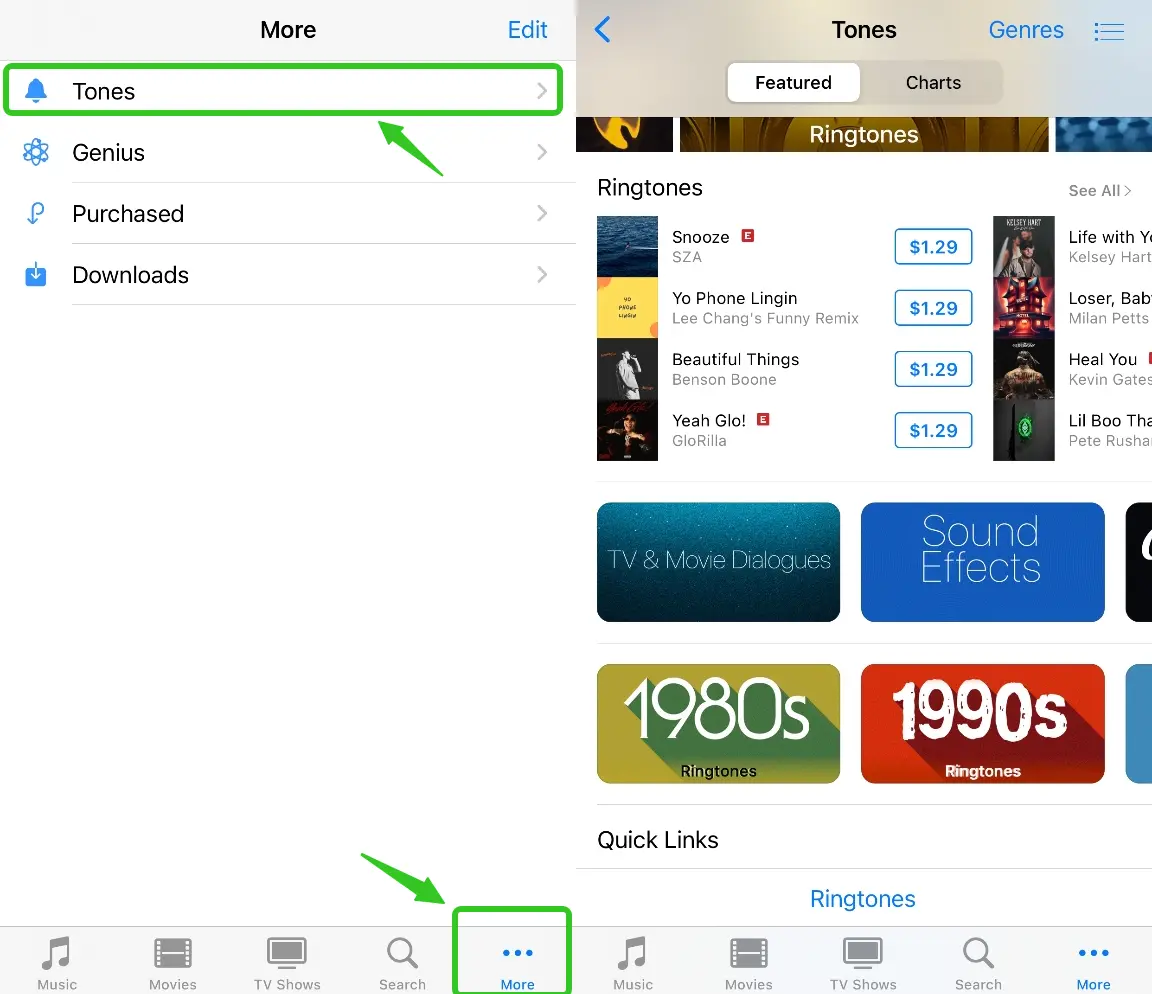
3. Browse or Search for Ringtones:
- You can browse the available ringtones by categories or charts.
- Alternatively, use the search bar to find specific ringtones or artists.
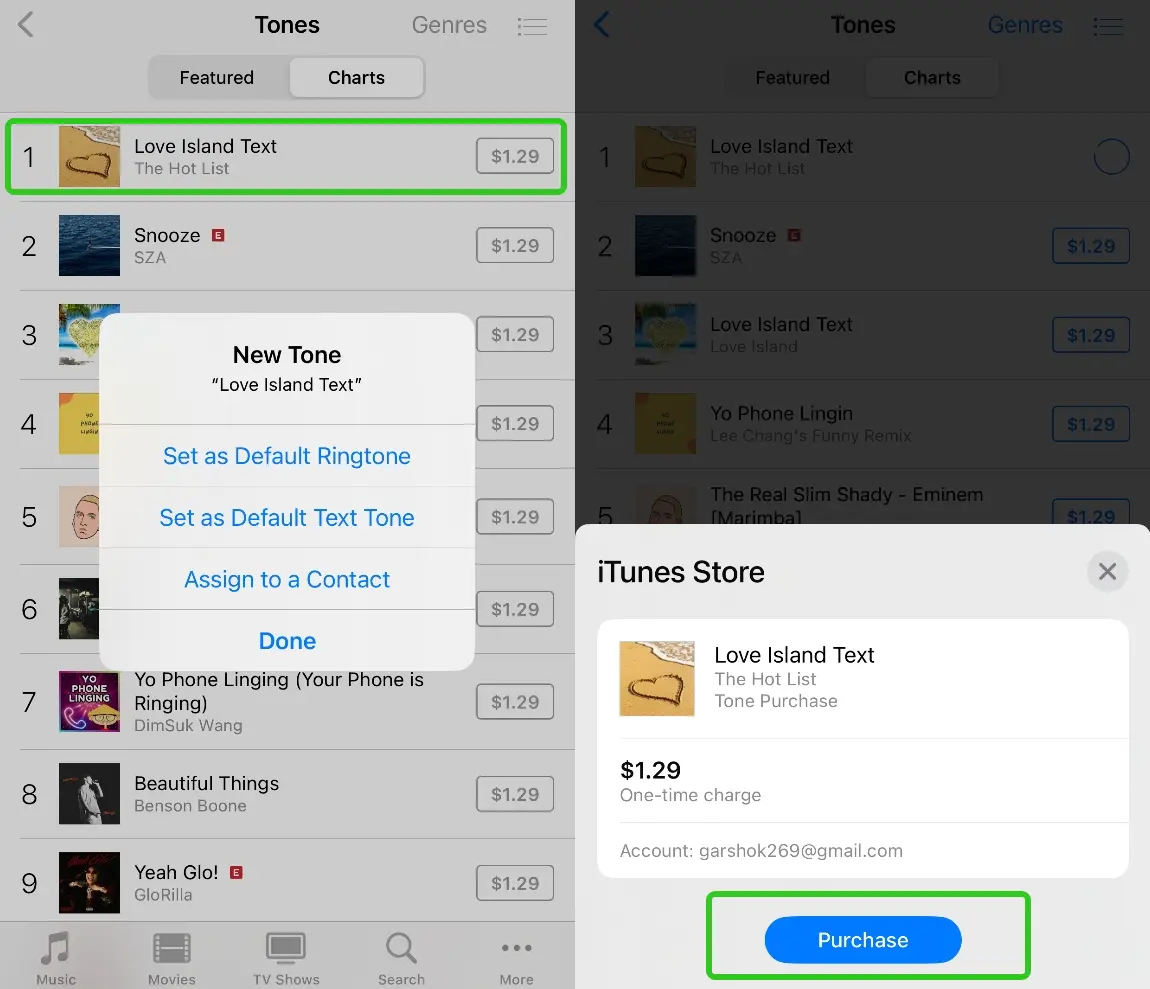
4. Preview and Select a Ringtone:
- Tap on any ringtone to preview it. You will hear a short clip of the ringtone.
- If you like the ringtone, tap on the price button next to it.
5. Purchase the Ringtone:
- A prompt will appear asking for your Apple ID password or Face ID/Touch ID for authentication.
- Confirm the purchase by entering your Apple ID password or using Face ID/Touch ID.
6. Set the Purchased Ringtone:
- After purchasing, you will see an option to set the ringtone immediately.
- Tap on "Set as Default Ringtone" to use it for all calls or "Assign to a Contact" to set it for a specific contact.
7. Find Purchased Ringtones Later:
- If you need to set the ringtone later, go to "Settings" > "Sounds & Haptics" > "Ringtone."
- Your purchased ringtones will be listed at the top under the "Store" section.
Following these steps will allow you to buy and set a custom ringtone from the Apple iTunes Store directly on your iPhone.
More Articles Like This